Custom apparel has become a popular way for creators, small businesses, and clothing brands to turn original artwork into products people can wear. From personalized gifts and event shirts to branded merchandise and small clothing collections, there are many reasons to produce custom designs without relying on large production runs.
Direct to Film, commonly called DTF printing, is one method that can be used to create transfers for garments. The process involves printing artwork onto a special film, applying adhesive powder, curing the transfer, and then using heat and pressure to apply the finished design to a garment. When each stage is handled carefully, the workflow can provide a practical approach to producing custom apparel.
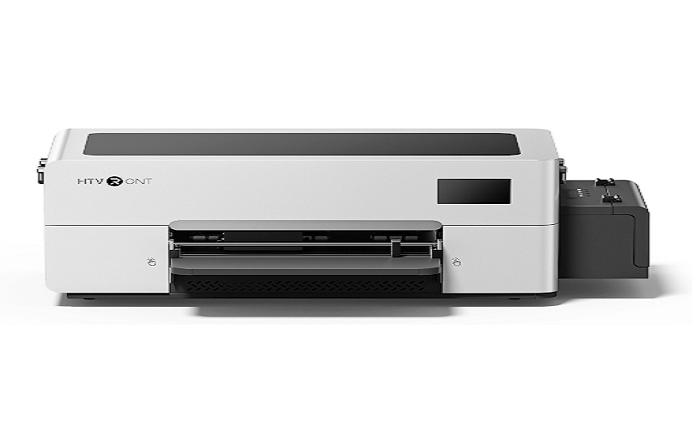
A typical setup can include a DTF printer for shirts, a DTF curing solution such as a DTF Oven, and a t shirt heat press machine. These pieces of equipment serve different purposes, but they work together as part of the same production process.
This guide explains how the process works, what beginners should consider before starting, and how to create a consistent workflow for personal projects or small-scale apparel production.
Understanding the DTF Printing Process
DTF printing starts with digital artwork. Instead of printing the design directly onto a shirt, the artwork is printed onto a coated DTF film. The printed image is then prepared with adhesive powder before being cured. Once the transfer is ready, it can be applied to a suitable garment with a heat press.
One advantage of this approach is that the artwork can be prepared digitally before any garment is pressed. This makes it easier to review dimensions, colors, placement, and other details before committing the design to a shirt. A well-prepared file can also help reduce wasted film and materials.
The complete workflow generally consists of several connected stages. First, artwork is prepared using suitable design software. The image is then printed onto DTF film using the appropriate printer settings and compatible consumables. Adhesive powder is applied to the printed area, and the transfer is cured so the powder can bond properly with the printed ink. Finally, the cured transfer is placed on the garment and applied using controlled heat and pressure.
Understanding the role of each stage is important because problems in one part of the workflow can affect the final result. For example, artwork with poor resolution may produce an unsatisfactory print, while inconsistent powder application or unsuitable heat press settings can affect transfer quality.
Preparing Artwork for DTF Transfers
Good DTF printing begins with good artwork. Before sending a design to the printer, check its resolution, dimensions, transparency, and overall appearance. Designs intended for apparel should be created or exported at a resolution suitable for the intended print size. Low-resolution images may appear soft or pixelated when enlarged.
Transparent backgrounds are particularly useful when creating designs for shirts. A transparent background allows the printed image to be transferred without an unwanted rectangular background surrounding the artwork. It is also important to consider the actual dimensions of the design rather than simply placing an image on the film at an arbitrary size.
Color management is another important part of preparation. The appearance of colors on a computer screen may not perfectly match the final printed transfer. Printer, ink, film, software, and color settings can all influence the result. For this reason, testing designs before producing larger quantities can help establish a reliable workflow.
Artwork should also be checked for small details, thin lines, and very small text. Elements that look clear on a large monitor may not translate as expected when printed at a smaller size. Beginners can save time by inspecting the artwork carefully before printing and keeping commonly used designs in organized, print-ready files.
Printing on DTF Film and Applying Adhesive Powder
Once the artwork is prepared, it can be printed onto compatible DTF film. A DTF printer is designed to deposit the image onto the film rather than directly onto the garment. The exact printing process depends on the equipment, software, ink, and film being used, so following the manufacturer’s instructions is important.
After printing, adhesive powder is applied to the appropriate side of the film while the ink is still in the required condition for the process. The powder needs to cover the printed areas consistently. Too little adhesive may affect bonding, while excessive or uneven powder can create unwanted results and make the transfer less clean.
For small operations, maintaining an organized work area can make this stage easier. Powder should be handled carefully and kept away from unnecessary surfaces. It is also useful to develop a repeatable method for applying and removing excess powder so that transfers receive consistent treatment from one job to the next.
Material compatibility matters throughout the process. DTF film, adhesive powder, and ink are not interchangeable products in every workflow, so users should follow the specifications provided for their equipment and consumables. Using materials according to their intended application helps reduce avoidable production problems and makes troubleshooting easier.
Curing Transfers with a DTF Oven
After adhesive powder has been applied, the transfer needs to be cured before it is ready for garment application. A DTF Oven can be used as part of this curing stage, depending on the equipment and workflow selected. The purpose of curing is to heat the adhesive powder so that it forms the appropriate layer on the printed transfer.
Curing requires attention to both temperature and time. The correct settings can vary according to the materials and equipment being used, so it is important not to assume that one setting will work for every combination of film, ink, and powder. Manufacturer instructions should be used as the starting point, followed by testing when necessary.
Consistent curing is especially important when producing multiple transfers. If one transfer receives substantially different treatment from another, the finished results may vary. Developing a repeatable curing routine can therefore help improve workflow consistency and make production easier to manage.
A curing unit can also make the process more organized because the curing stage has a dedicated place in the production workflow. Beginners should still follow appropriate operating and safety instructions for their equipment and keep the workspace clean. Proper handling of powder, film, and heated equipment is an important part of maintaining a practical production environment.
Applying DTF Transfers with a Heat Press
Once the transfer has been printed and properly cured, it can be applied to a garment using a t shirt heat press machine. The heat press provides controlled heat and pressure, allowing the transfer adhesive to bond with the fabric according to the recommended process.
Before pressing, prepare the garment by placing it on a clean, suitable surface and positioning the transfer carefully. Check the design placement from multiple angles before applying heat. For shirts, common placement areas include the center chest, left chest, and back, but the best position depends on the design and the purpose of the garment.
Heat, pressure, and pressing time are important variables. The appropriate settings depend on the transfer materials, garment fabric, and equipment. Rather than relying on a universal setting, follow the instructions associated with the materials being used. A small test can also be useful when working with a new garment or transfer combination.
Garment selection deserves attention as well. DTF transfers can be used with a range of apparel materials, but every fabric should not be treated as though it has identical requirements. Cotton, polyester, blends, and other textiles can respond differently to heat. Checking garment care information and material compatibility before production can help prevent avoidable issues.
After pressing, the transfer should be handled according to the recommended peel and finishing instructions. Some transfers require a particular peel method or additional pressing step. Following the specific process for the materials being used is more reliable than assuming every DTF transfer behaves in exactly the same way.
Building an Efficient Workflow and Avoiding Common Mistakes
A small DTF apparel operation becomes easier to manage when each stage has a clear place in the workflow. Artwork preparation, printing, powder application, curing, garment preparation, heat pressing, and quality inspection should be treated as connected steps rather than separate tasks. This organization can make it easier to identify where a problem occurred if a finished shirt does not meet expectations.
One common mistake is rushing through artwork preparation. A design that is incorrectly sized, poorly aligned, or saved in an unsuitable format can create problems before printing even begins. Another issue is inconsistent adhesive powder application. Uneven coverage can affect the finished transfer, so taking time to develop a consistent process is worthwhile.
Heat press settings are another frequent source of variation. Using the wrong temperature, pressure, or pressing time can produce an inconsistent result. Beginners should keep notes about successful material combinations and recommended settings. Over time, these records can become a useful reference for repeat orders.
Equipment maintenance also contributes to a reliable workflow. Printers should be maintained according to the manufacturer’s instructions, especially when they are used regularly. Cleaning routines, proper storage of consumables, and attention to ink or film handling can help reduce interruptions. Heat press surfaces should also be kept clean and checked regularly so that transfers can be positioned and pressed consistently.
Quality control is particularly important for small businesses. Before delivering an order, inspect the design for placement, appearance, adhesion, and overall finish. For larger batches, checking samples during production rather than waiting until the entire order is complete can help identify problems earlier.
Using DTF Printing for Custom Apparel and Small Business
DTF printing can be useful for creators who want to produce custom apparel without limiting themselves to a single type of design. Personalized names, illustrations, logos, promotional graphics, event shirts, team apparel, and branded merchandise are examples of projects that can be approached through a DTF workflow.
Small businesses can also use the process for short production runs and customized orders. Instead of treating every project as a large manufacturing job, a business can organize its workflow around individual customer requirements. This can be useful for businesses that receive varied orders and need flexibility in the types of artwork they produce.
Production efficiency becomes more important as order volume grows. A well-organized workspace can separate printed transfers from uncured transfers, finished transfers, blank garments, and completed shirts. Keeping materials labeled and maintaining consistent production steps can reduce confusion when several designs are being processed at the same time.
The choice of equipment should match the intended workload. A DTF printer for shirts handles the printing stage, while a DTF Oven can be incorporated into the curing stage and a t shirt heat press machine handles garment application. These components should be viewed as parts of one workflow rather than isolated pieces of equipment.
For beginners, starting with a manageable range of designs and garments can make the learning process easier. Testing different materials, recording successful settings, and reviewing finished transfers can gradually build practical experience. As confidence grows, the same workflow can be adapted for more designs, personalized products, and larger order quantities.
Conclusion
DTF printing provides a practical workflow for creating custom apparel from digital artwork. The process begins with preparing a suitable design and printing it onto DTF film. Adhesive powder is then applied and cured before the finished transfer is applied to a garment using controlled heat and pressure.
A DTF printer, curing equipment such as a DTF Oven, and a t shirt heat press machine each play a distinct role in this process. When these stages are organized properly, creators and small businesses can develop a repeatable method for producing custom shirts and other apparel.
The most important part of successful DTF production is consistency. Paying attention to artwork quality, material compatibility, powder application, curing, heat press settings, equipment care, and final inspection can make the workflow easier to manage. Whether the goal is producing personalized shirts for individual customers or developing a small custom apparel business, learning each stage of the process provides a strong foundation for better and more reliable results.